Creating and using CI/CD pipelines
Introduced in GitLab 8.8.
NOTE: Tip: Watch our "Mastering continuous software development" webcast to see a comprehensive demo of GitLab CI/CD pipeline.
Introduction
Pipelines are the top-level component of continuous integration, delivery, and deployment.
Pipelines comprise:
- Jobs that define what to run. For example, code compilation or test runs.
- Stages that define when and how to run. For example, that tests run only after code compilation.
Multiple jobs in the same stage are executed by Runners in parallel, if there are enough concurrent Runners.
If all the jobs in a stage:
- Succeed, the pipeline moves on to the next stage.
- Fail, the next stage is not (usually) executed and the pipeline ends early.
NOTE: Note: If you have a mirrored repository that GitLab pulls from, you may need to enable pipeline triggering in your project's Settings > Repository > Pull from a remote repository > Trigger pipelines for mirror updates.
Simple pipeline example
As an example, imagine a pipeline consisting of four stages, executed in the following order:
build, with a job calledcompile.test, with two jobs calledtestandtest2.staging, with a job calleddeploy-to-stage.production, with a job calleddeploy-to-prod.
Visualizing pipelines
Introduced in GitLab 8.11.
Pipelines can be complex structures with many sequential and parallel jobs.
To make it easier to understand the flow of a pipeline, GitLab has pipeline graphs for viewing pipelines and their statuses.
Pipeline graphs can be displayed in two different ways, depending on the page you access the graph from.
NOTE: Note: GitLab capitalizes the stages' names when shown in the pipeline graphs (below).
Regular pipeline graphs
Regular pipeline graphs show the names of the jobs of each stage. Regular pipeline graphs can be found when you are on a single pipeline page. For example:

Pipeline mini graphs
Pipeline mini graphs take less space and can tell you at a quick glance if all jobs passed or something failed. The pipeline mini graph can be found when you navigate to:
- The pipelines index page.
- A single commit page.
- A merge request page.
Pipeline mini graphs allow you to see all related jobs for a single commit and the net result of each stage of your pipeline. This allows you to quickly see what failed and fix it.
Stages in pipeline mini graphs are collapsible. Hover your mouse over them and click to expand their jobs.
| Mini graph | Mini graph expanded |
|---|---|
 |
 |
Job ordering in pipeline graphs
Job ordering depends on the type of pipeline graph. For regular pipeline graphs, jobs are sorted by name.
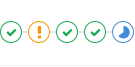
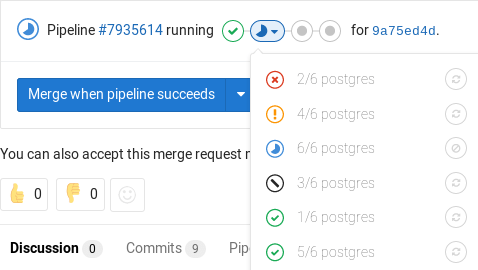
For pipeline mini graphs (introduced in GitLab 9.0), jobs are sorted by severity and then by name.
The order of severity is:
- failed
- warning
- pending
- running
- manual
- scheduled
- canceled
- success
- skipped
- created
For example:
How pipeline duration is calculated
Total running time for a given pipeline excludes retries and pending (queued) time.
Each job is represented as a Period, which consists of:
Period#first(when the job started).Period#last(when the job finished).
A simple example is:
- A (1, 3)
- B (2, 4)
- C (6, 7)
In the example:
- A begins at 1 and ends at 3.
- B begins at 2 and ends at 4.
- C begins at 6 and ends at 7.
Visually, it can be viewed as:
0  1  2  3  4  5  6  7
   AAAAAAA
      BBBBBBB
                  CCCC
The union of A, B, and C is (1, 4) and (6, 7). Therefore, the total running time is:
(4 - 1) + (7 - 6) => 4
Expanding and collapsing job log sections
Introduced in GitLab 12.0.
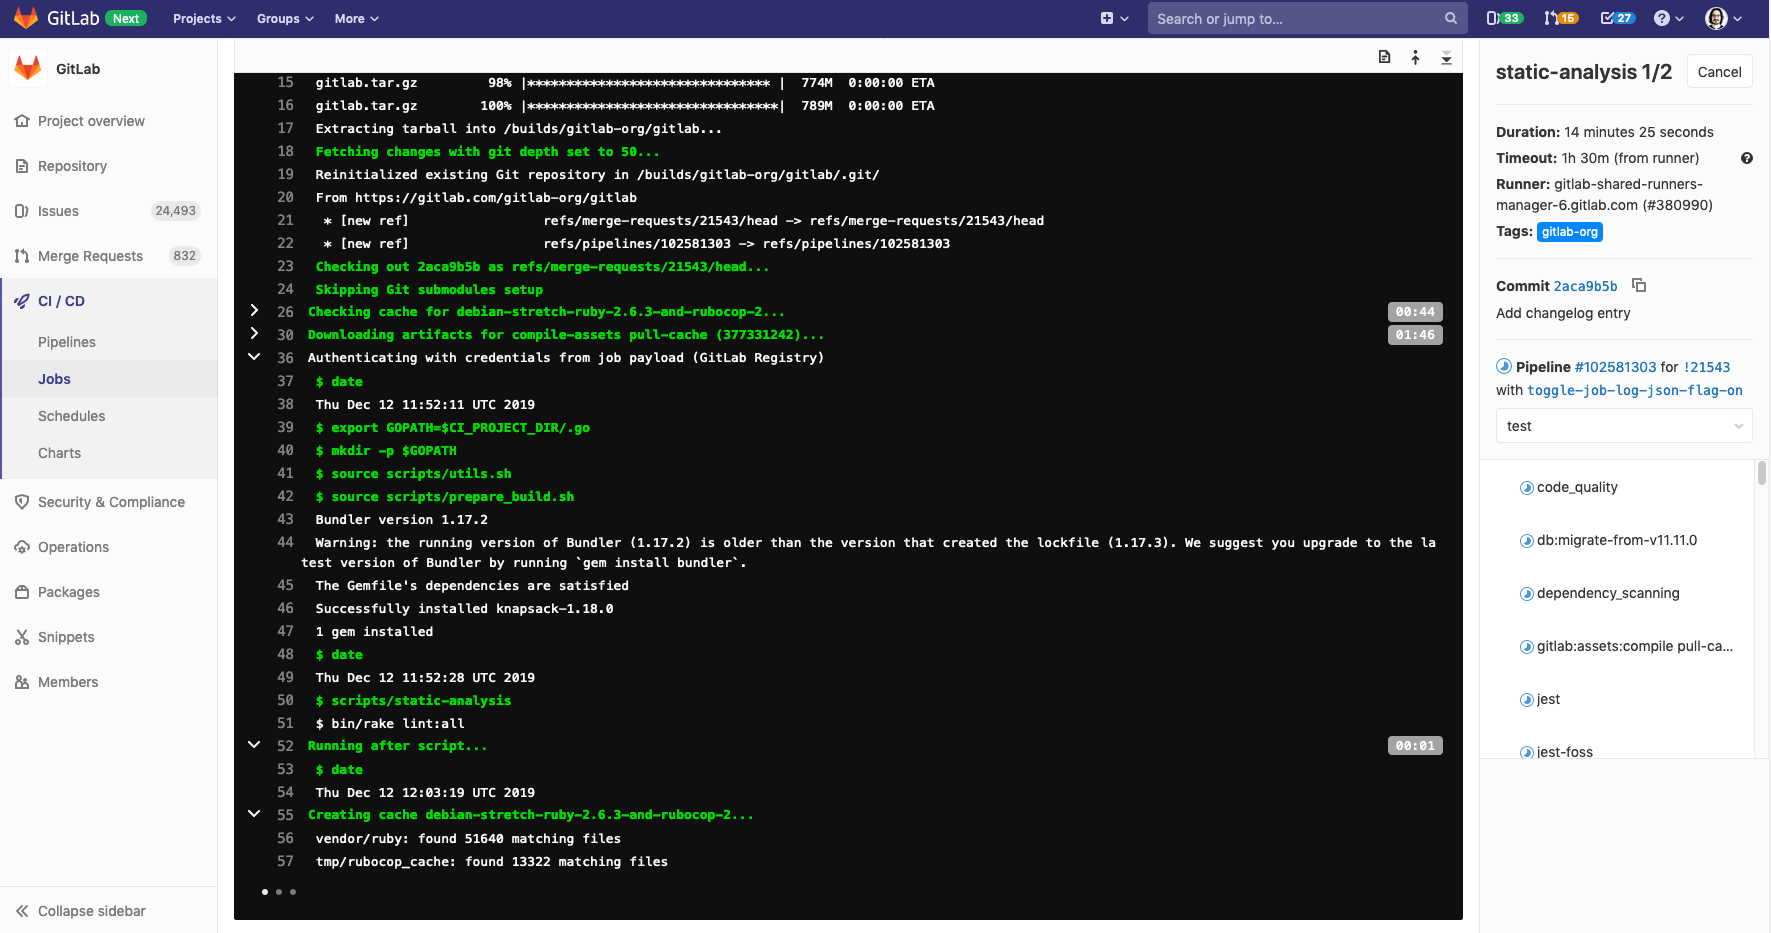
Job logs are divided into sections that can be collapsed or expanded. Each section will display the duration.
In the following example:
- Two sections are collapsed and can be expanded.
- Three sections are expanded and can be collapsed.
Configuring pipelines
Pipelines, and their component jobs and stages, are defined in the .gitlab-ci.yml file for each project.
In particular:
- Jobs are the basic configuration component.
- Stages are defined using the
stageskeyword.
For all available configuration options, see the GitLab CI/CD Pipeline Configuration Reference.
Settings and schedules
In addition to configuring jobs through .gitlab-ci.yml, additional configuration options are available
through the GitLab UI:
- Pipeline settings for each project. For more information, see Pipeline settings.
- Schedules for pipelines. For more information, see Pipeline schedules.
Grouping jobs
Introduced in GitLab 8.12.
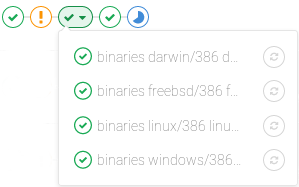
If you have many similar jobs, your pipeline graph becomes long and hard to read.
For that reason, similar jobs can automatically be grouped together. If the job names are formatted in certain ways, they will be collapsed into a single group in regular pipeline graphs (not the mini graphs).
You'll know when a pipeline has grouped jobs if you don't see the retry or cancel button inside them. Hovering over them will show the number of grouped jobs. Click to expand them.
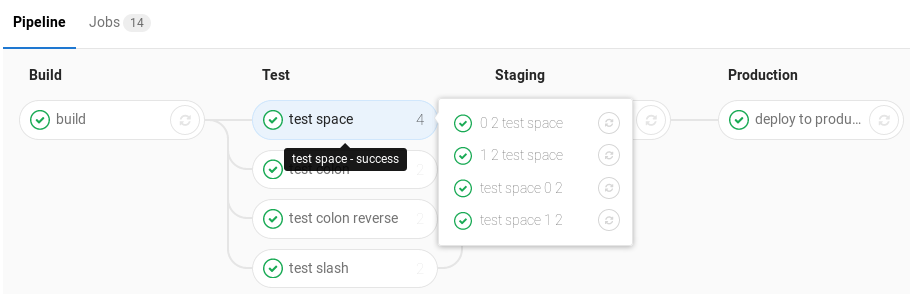
Configuring grouping
In the pipeline configuration file, job names must include two numbers separated with one of the following (you can even use them interchangeably):
- A space.
- A slash (
/). - A colon (
:).
NOTE: Note:
More specifically, it uses this regular expression: \d+[\s:\/\\]+\d+\s*.
How grouping works
The jobs will be ordered by comparing those two numbers from left to right. You usually want the first to be the index and the second the total.
For example, the following jobs will be grouped under a job named test:
test 0 3test 1 3test 2 3
The following jobs will be grouped under a job named test ruby:
test 1:2 rubytest 2:2 ruby
The following jobs will be grouped under a job named test ruby as well:
1/3 test ruby2/3 test ruby3/3 test ruby
Pipelines for merge requests
GitLab supports configuring pipelines that run only for merge requests. For more information, see Pipelines for merge requests.
Badges
Pipeline status and test coverage report badges are available and configurable for each project.
For information on adding pipeline badges to projects, see Pipeline badges.
Multi-project pipelines (PREMIUM)
Pipelines for different projects can be combined and visualized together.
For more information, see Multi-project pipelines.
Working with pipelines
In general, pipelines are executed automatically and require no intervention once created.
However, there are instances where you'll need to interact with pipelines. These are documented below.
Manually executing pipelines
Pipelines can be manually executed, with predefined or manually-specified variables.
You might do this if the results of a pipeline (for example, a code build) is required outside the normal operation of the pipeline.
To execute a pipeline manually:
- Navigate to your project's CI/CD > Pipelines.
- Click on the Run Pipeline button.
- On the Run Pipeline page:
- Select the branch to run the pipeline for in the Create for field.
- Enter any environment variables required for the pipeline run.
- Click the Create pipeline button.
The pipeline will execute the jobs as configured.
Using a query string
Introduced in GitLab 12.5.
Variables on the Run Pipeline page can be pre-populated by passing variable keys and values
in a query string appended to the pipelines/new URL. The format is:
.../pipelines/new?ref=<branch>&var[<variable_key>]=<value>&file_var[<file_key>]=<value>
The following parameters are supported:
ref: specify the branch to populate the Run for field with.var: specify aVariablevariable.file_var: specify aFilevariable.
For each var or file_var, a key and value are required.
For example, the query string
.../pipelines/new?ref=my_branch&var[foo]=bar&file_var[file_foo]=file_bar will pre-populate the
Run Pipeline page as follows:
- Run for field:
my_branch. - Variables section:
- Variable:
- Key:
foo - Value:
bar
- Key:
- File:
- Key:
file_foo - Value:
file_bar
- Key:
Accessing pipelines
You can find the current and historical pipeline runs under your project's CI/CD > Pipelines page. You can also access pipelines for a merge request by navigating to its Pipelines tab.
Clicking on a pipeline will bring you to the Pipeline Details page and show the jobs that were run for that pipeline. From here you can cancel a running pipeline, retry jobs on a failed pipeline, or delete a pipeline.
Accessing individual jobs
When you access a pipeline, you can see the related jobs for that pipeline.
Clicking on an individual job will show you its job log, and allow you to:
- Cancel the job.
- Retry the job.
- Erase the job log.
Seeing the failure reason for jobs
Introduced in GitLab 10.7.
When a pipeline fails or is allowed to fail, there are several places where you can quickly check the reason it failed:
- In the pipeline graph, on the pipeline detail view.
- In the pipeline widgets, in the merge requests and commit pages.
- In the job views, in the global and detailed views of a job.
In each place, if you hover over the failed job you can see the reason it failed.
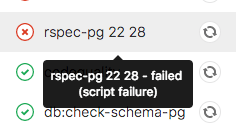
From GitLab 10.8, you can also see the reason it failed on the Job detail page.
Manual actions from pipeline graphs
Introduced in GitLab 8.15.
Manual actions, configured using the when:manual parameter,
allow you to require manual interaction before moving forward in the pipeline.
You can do this straight from the pipeline graph. Just click on the play button to execute that particular job.
For example, your pipeline start automatically, but require manual action to
deploy to production. In the example below, the production
stage has a job with a manual action.
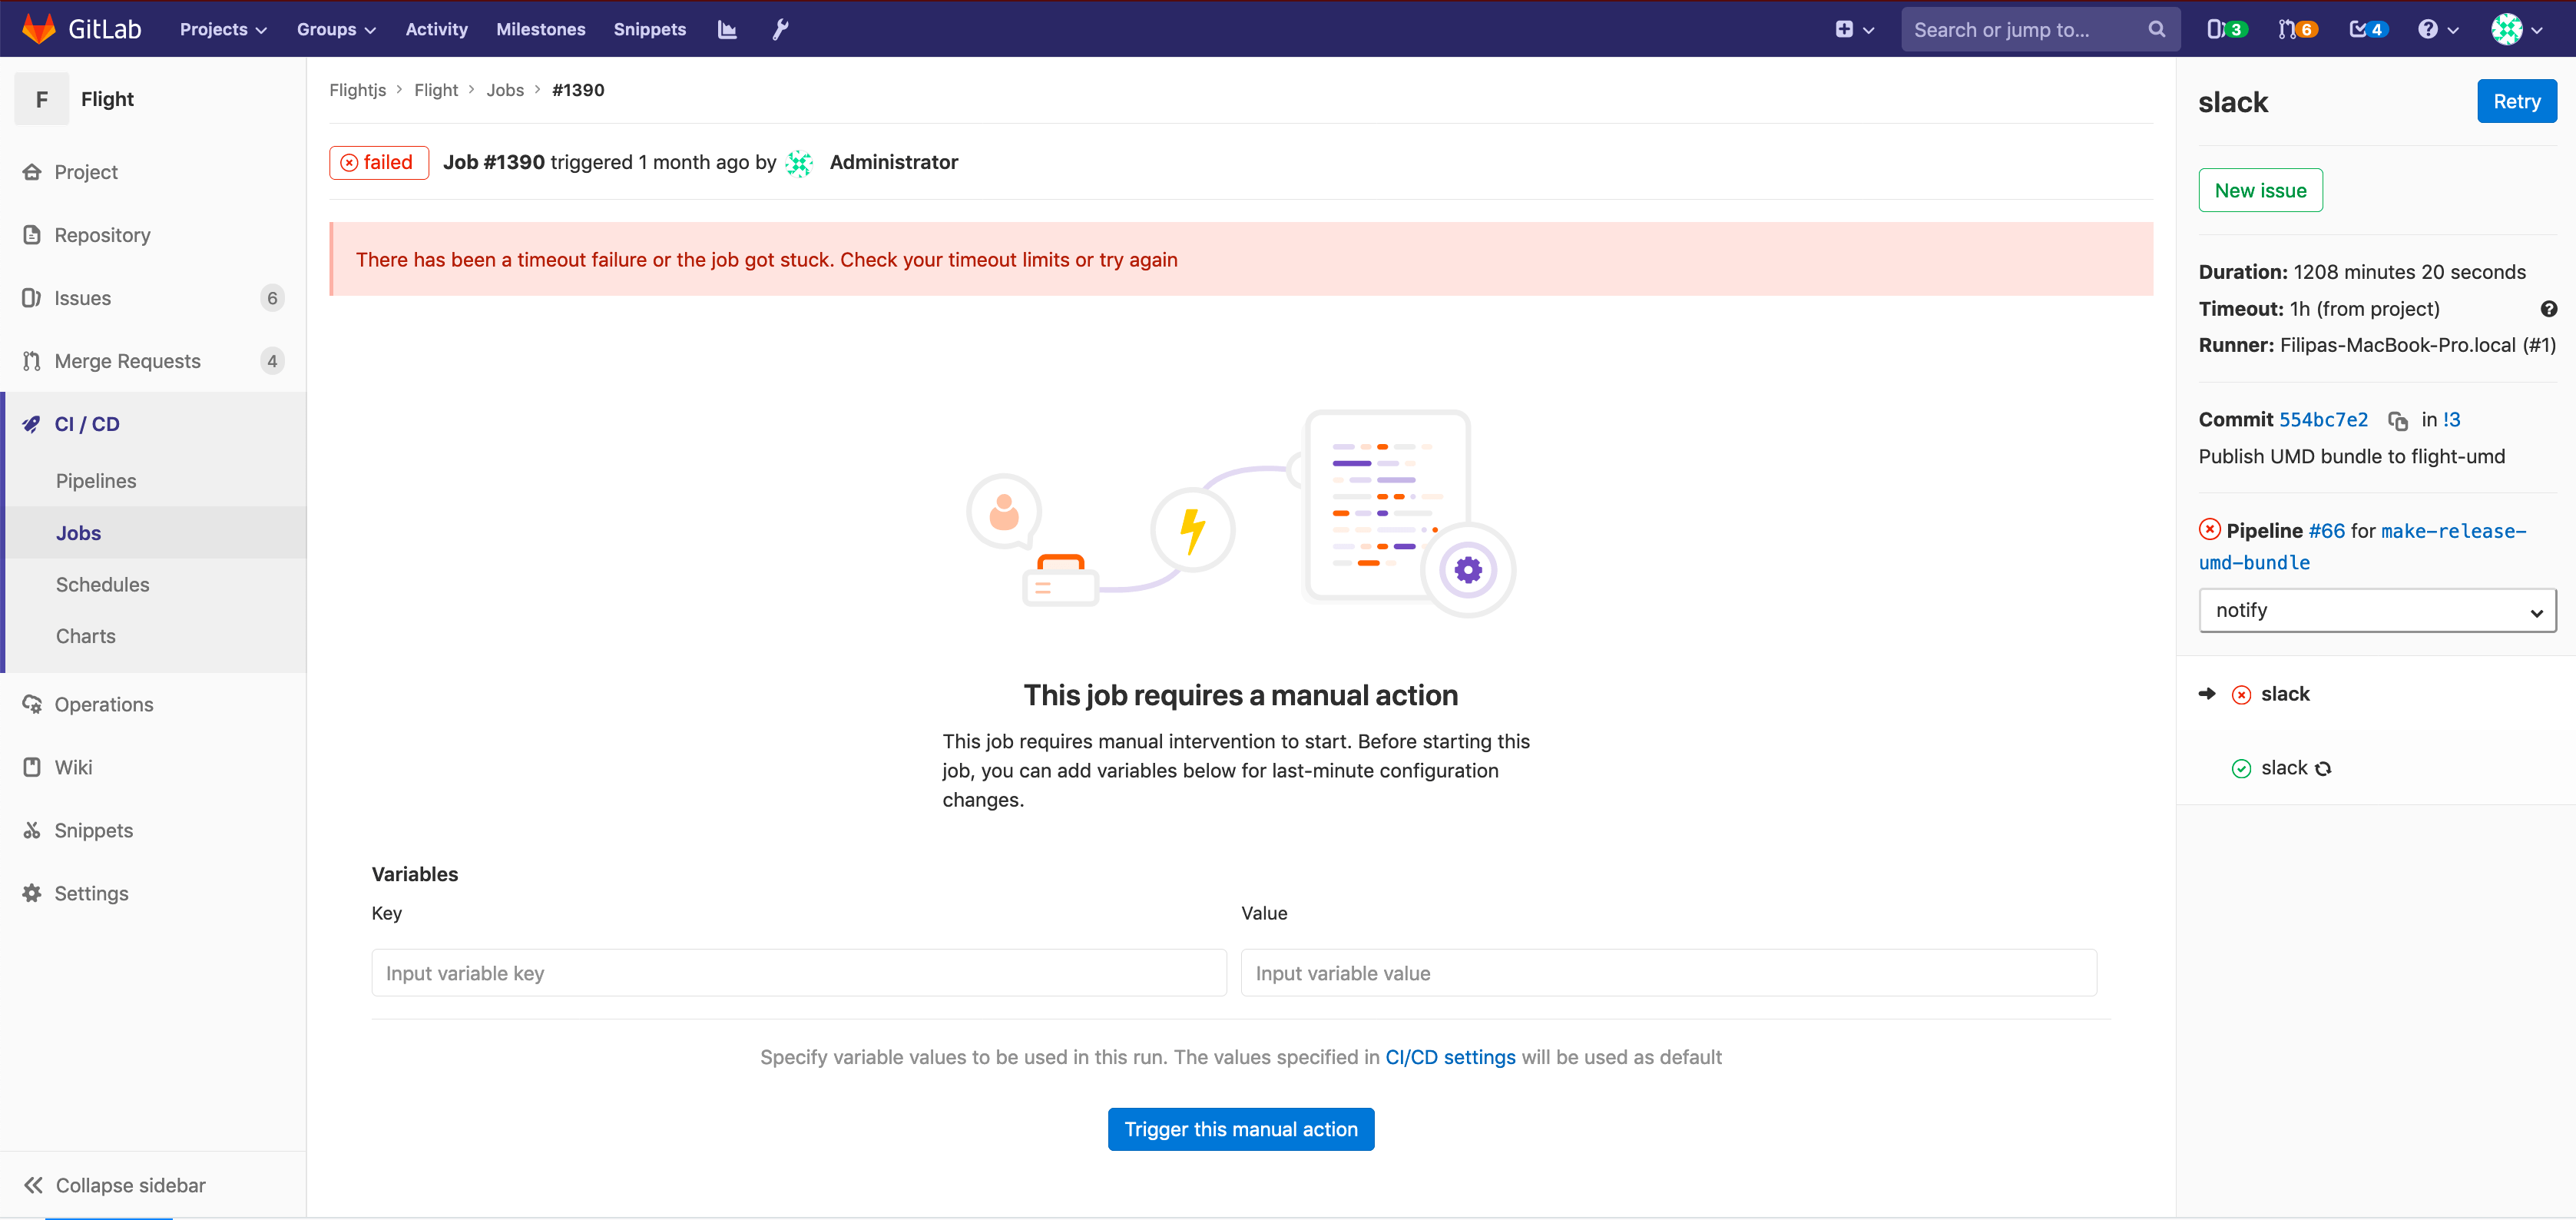
Specifying variables when running manual jobs
Introduced in GitLab 12.2.
When running manual jobs you can supply additional job specific variables.
You can do this from the job page of the manual job you want to run with additional variables.
This is useful when you want to alter the execution of a job by using environment variables.
Delay a job in a pipeline graph
Introduced in GitLab 11.4.
When you do not want to run a job immediately, you can use the when:delayed parameter to
delay a job's execution for a certain period.
This is especially useful for timed incremental rollout where new code is rolled out gradually.
For example, if you start rolling out new code and:
- Users do not experience trouble, GitLab can automatically complete the deployment from 0% to 100%.
- Users experience trouble with the new code, you can stop the timed incremental rollout by canceling the pipeline and rolling back to the last stable version.

Using the API
GitLab provides API endpoints to:
- Perform basic functions. For more information, see Pipelines API.
- Maintain pipeline schedules. For more information, see Pipeline schedules API.
- Trigger pipeline runs. For more information, see:
- Triggering pipelines through the API.
- Pipeline triggers API.
Start multiple manual actions in a stage
Introduced in GitLab 11.11.
Multiple manual actions in a single stage can be started at the same time using the "Play all manual" button. Once the user clicks this button, each individual manual action will be triggered and refreshed to an updated status.
This functionality is only available:
- For users with at least Developer access.
- If the the stage contains manual actions.
Deleting a single pipeline
Introduced in GitLab 12.7.
Users with owner permissions in a project can delete a pipeline by clicking on the pipeline in the CI/CD > Pipelines to get to the Pipeline Details page, then using the Delete button.

CAUTION: Warning: Deleting a pipeline will expire all pipeline caches, and delete all related objects, such as builds, logs, artifacts, and triggers. This action cannot be undone.
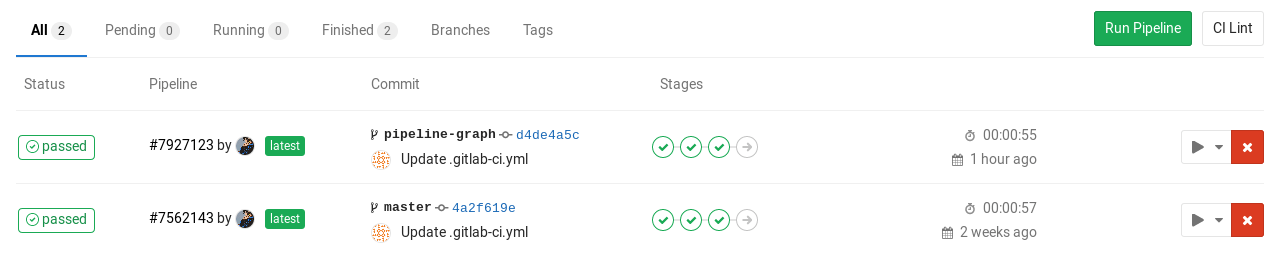
Most Recent Pipeline
Introduced in GitLab 12.3.
There's a link to the latest pipeline for the last commit of a given branch at /project/pipelines/[branch]/latest. Also, /project/pipelines/latest will redirect you to the latest pipeline for the last commit on the project's default branch.
Security on protected branches
A strict security model is enforced when pipelines are executed on protected branches.
The following actions are allowed on protected branches only if the user is allowed to merge or push on that specific branch:
- Run manual pipelines (using the Web UI or pipelines API).
- Run scheduled pipelines.
- Run pipelines using triggers.
- Trigger manual actions on existing pipelines.
- Retry or cancel existing jobs (using the Web UI or pipelines API).
Variables marked as protected are accessible only to jobs that run on protected branches, preventing untrusted users getting unintended access to sensitive information like deployment credentials and tokens.
Runners marked as protected can run jobs only on protected branches, avoiding untrusted code to be executed on the protected runner and preserving deployment keys and other credentials from being unintentionally accessed. In order to ensure that jobs intended to be executed on protected runners will not use regular runners, they must be tagged accordingly.
Persistent pipeline refs
Introduced in GitLab 12.4.
Previously, you'd have encountered unexpected pipeline failures when you force-pushed a branch to its remote repository. To illustrate the problem, suppose you've had the current workflow:
- A user creates a feature branch named
exampleand pushes it to a remote repository. - A new pipeline starts running on the
examplebranch. - A user rebases the
examplebranch on the latestmasterbranch and force-pushes it to its remote repository. - A new pipeline starts running on the
examplebranch again, however, the previous pipeline (2) fails because offatal: reference is not a tree:error.
This is because the previous pipeline cannot find a checkout-SHA (which associated with the pipeline record)
from the example branch that the commit history has already been overwritten by the force-push.
Similarly, Pipelines for merged results
might have failed intermittently due to the same reason.
As of GitLab 12.4, we've improved this behavior by persisting pipeline refs exclusively. To illustrate its life cycle:
- A pipeline is created on a feature branch named
example. - A persistent pipeline ref is created at
refs/pipelines/<pipeline-id>, which retains the checkout-SHA of the associated pipeline record. This persistent ref stays intact during the pipeline execution, even if the commit history of theexamplebranch has been overwritten by force-push. - GitLab Runner fetches the persistent pipeline ref and gets source code from the checkout-SHA.
- When the pipeline finished, its persistent ref is cleaned up in a background process.
NOTE: NOTE: At this moment, this feature is on by default and can be manually disabled
by disabling depend_on_persistent_pipeline_ref feature flag. If you're interested in
manually disabling this behavior, please ask the administrator
to execute the following commands in rails console.
> sudo gitlab-rails console                                        # Login to Rails console of GitLab instance.
> project = Project.find_by_full_path('namespace/project-name')    # Get the project instance.
> Feature.disable(:depend_on_persistent_pipeline_ref, project)     # Disable the feature flag for specific project
> Feature.disable(:depend_on_persistent_pipeline_ref)              # Disable the feature flag system-wide