Vault Authentication with GitLab OpenID Connect
Introduced in GitLab 9.0
Vault is a secrets management application offered by HashiCorp. It allows you to store and manage sensitive information such secret environment variables, encryption keys, and authentication tokens. Vault offers Identity-based Access, which means Vault users can authenticate through several of their preferred cloud providers.
In this document, we'll explain how Vault users can authenticate themselves through GitLab by utilizing our OpenID authentication feature. The following assumes you already have Vault installed and running.
-
Get the OpenID Connect client ID and secret from GitLab:
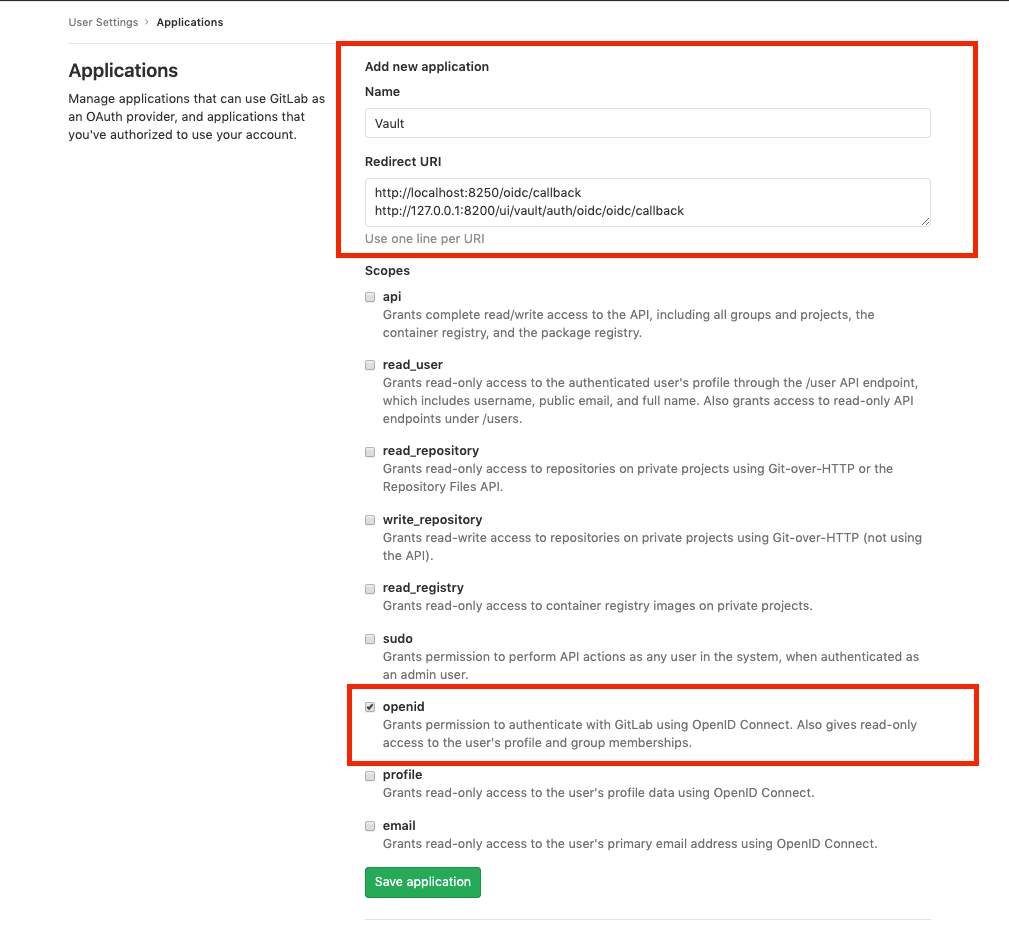
First you'll need to create a GitLab application to obtain an application ID and secret for authenticating into Vault. To do this, sign in to GitLab and follow these steps:
- On GitLab, click your avatar on the top-right corner, and select your user Settings > Applications.
- Fill out the application Name and Redirect URI, making sure to select the OpenID scope.
- Save application.
- Copy client ID and secret, or keep the page open for reference.
-
Enable OIDC auth on Vault:
OpenID Connect is not enabled in Vault by default. This needs to be enabled in the terminal.
Open a terminal session and run the following command to enable the OpenID Connect authentication provider in Vault:
bash
vault auth enable oidc
You should see the following output in the terminal:
bash Success! Enabled oidc auth method at: oidc/ -
Write the OIDC config:
Next, Vault needs to be given the application ID and secret generated by GitLab.
In the terminal session, run the following command to give Vault access to the GitLab application you've just created with an OpenID scope. This allows Vault to authenticate through GitLab.
Replace
your_application_idandyour_secretin the example below with the application ID and secret generated for your app:bash $ vault write auth/oidc/config \ oidc_discovery_url="https://gitlab.com" \ oidc_client_id="your_application_id" \ oidc_client_secret="your_secret" \ default_role="demo" \ bound_issuer="localhost"You should see the following output in the terminal:
bash Success! Data written to: auth/oidc/config -
Write the OIDC Role Config:
Now that Vault has a GitLab application ID and secret, it needs to know the Redirect URIs and scopes given to GitLab during the application creation process. The redirect URIs need to match where your Vault instance is running. The
oidc_scopesfield needs to include theopenid. Similarly to the previous step, replaceyour_application_idwith the generated application ID from GitLab:This configuration is saved under the name of the role you are creating. In this case, we are creating a
demorole. Later, we'll show how you can access this role through the Vault CLI.bash vault write auth/oidc/role/demo \ user_claim="sub" \ allowed_redirect_uris="http://localhost:8250/oidc/callback,http://127.0.0.1:8200/ui/vault/auth/oidc/oidc/callback" \ bound_audiences="your_application_id" \ role_type="oidc" \ oidc_scopes="openid" \ policies=demo \ ttl=1h -
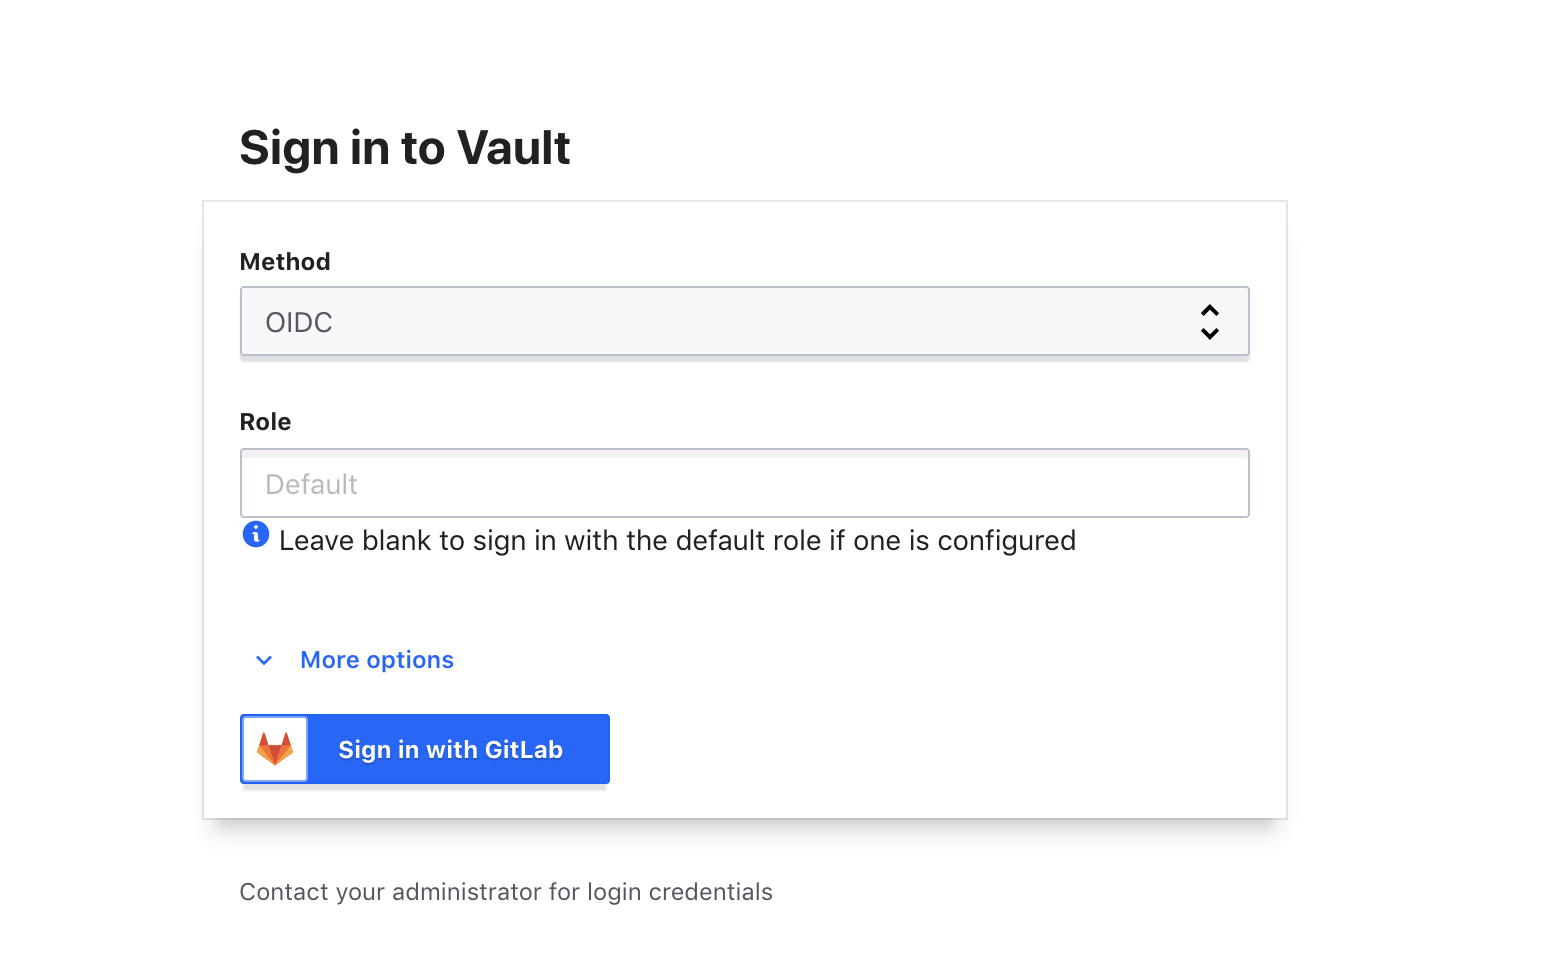
Sign in to Vault:
- Go to your Vault UI (example: http://127.0.0.1:8200/ui/vault/auth?with=oidc).
- If the
OIDCmethod is not currently selected, open the dropdown and select it. -
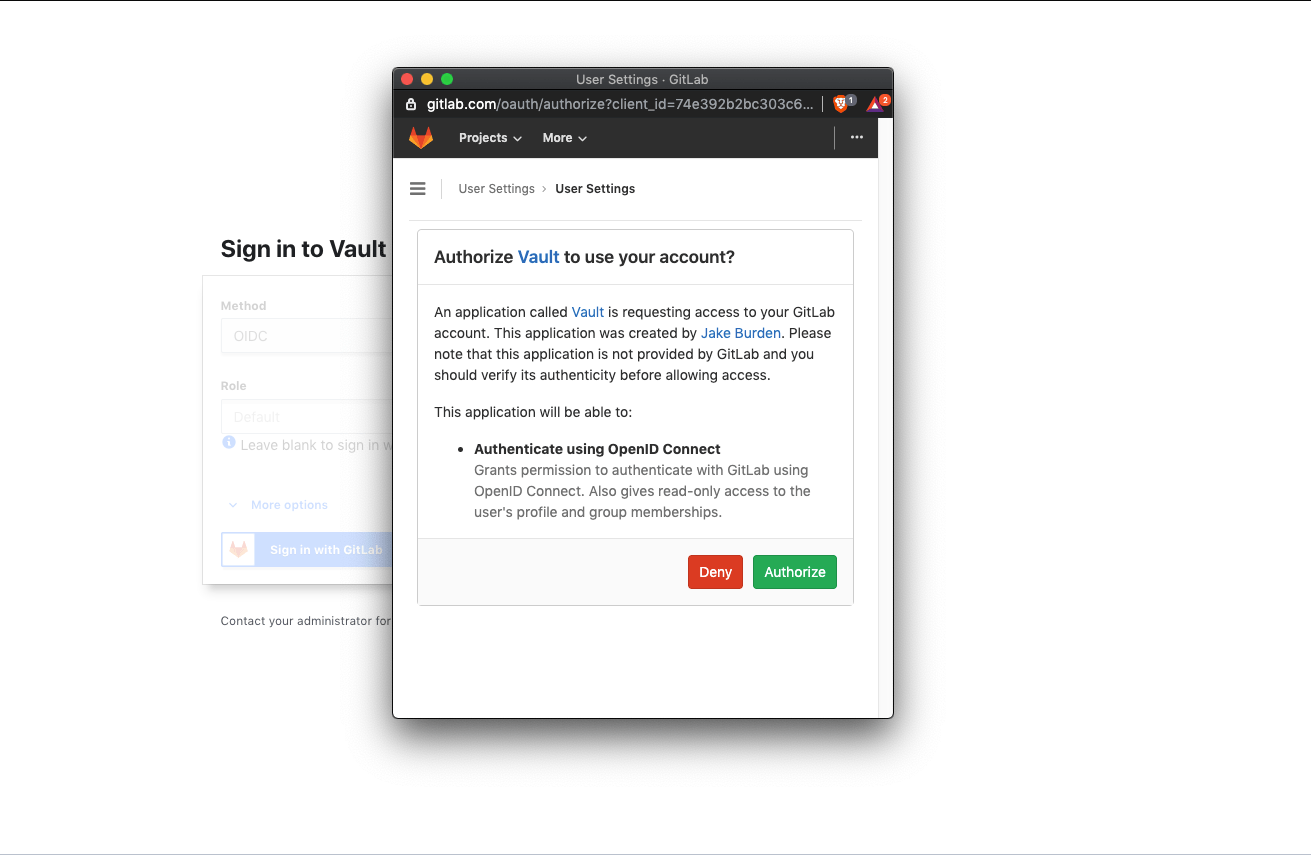
Click the Sign in With GitLab button, which will open a modal window:
-
Click Authorize on the modal to allow Vault to sign in through GitLab. This will redirect you back to your Vault UI as a signed-in user.
-
Sign in using the Vault CLI (optional):
Vault also allows you to sign in via their CLI.
After writing the same configurations from above, you can run the command below in your terminal to sign in with the role configuration created in step 4 above:
bash
vault login -method=oidc port=8250 role=demo
Here is a short explaination of what this command does:
- In the Write the OIDC Role Config (step 4), we created a role called
demo. We setrole=demoso Vault knows which configuration we'd like to login in with. - To set Vault to use the
OIDCsign-in method, we set-method=oidc. - To set the port that GitLab should redirect to, we set
port=8250or another port number that matches the port given to GitLab when listing Redirect URIs.
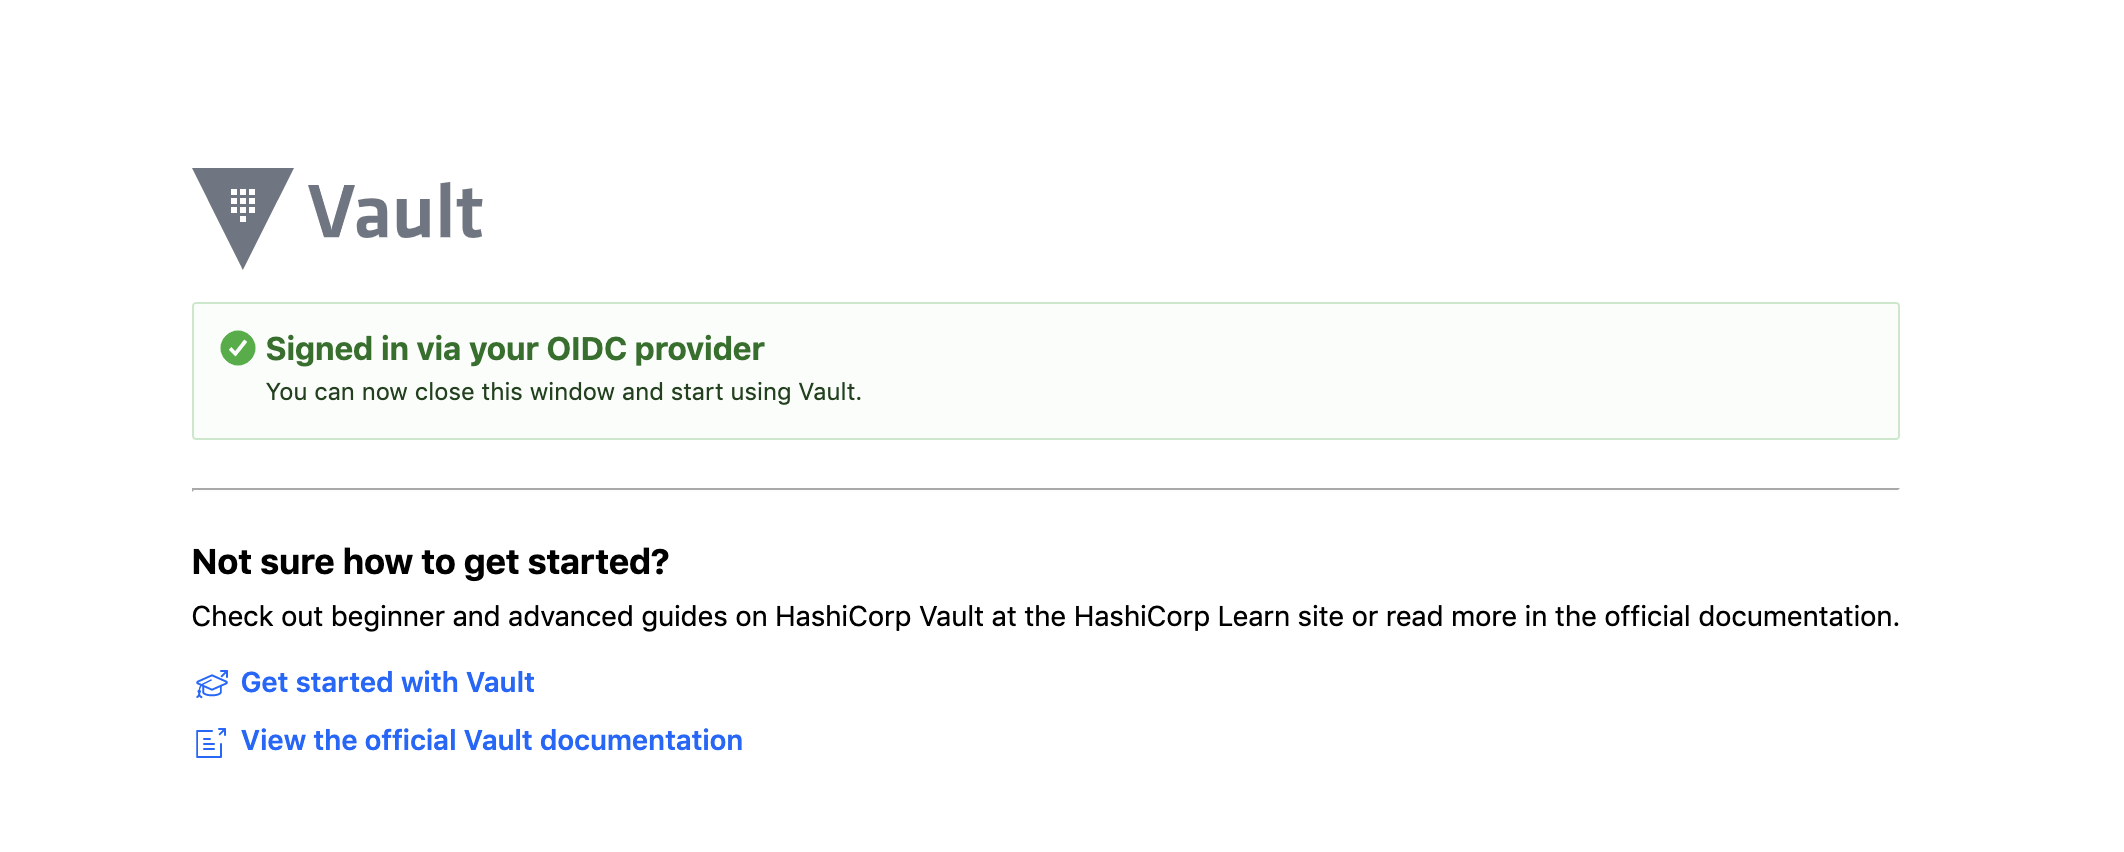
Once you run the command above, it will present a link in the terminal. Click the link in the terminal and a tab will open in the browser confirming you're signed into Vault via OIDC:
The terminal will output:
Success! You are now authenticated. The token information displayed below is already stored in the token helper. You do NOT need to run "vault login" again. Future Vault requests will automatically use this token. - In the Write the OIDC Role Config (step 4), we created a role called